FixIt添加Giscus评论功能

记录在 Hugo FixIt 主题中配置 Giscus 评论系统的过程。

前言

Giscus 是一个基于 GitHub Discussions 的评论系统,适合静态博客使用。

它的基本原理是:

1
2
3
4
5
博客文章页面
加载 Giscus
把评论存到 GitHub Discussions

对于 Hugo + FixIt 博客来说,只需要在 hugo.toml 中配置好 Giscus 参数即可。

一、准备 GitHub 评论仓库

可以新建一个专门用于评论的仓库,例如:

1
blog-comments

也可以使用博客源码仓库。

建议使用单独仓库,结构更清晰。

仓库需要满足:

1
2
3
1. 仓库必须是 Public
2. 开启 Discussions
3. 安装 Giscus App

二、开启 GitHub Discussions

进入评论仓库:

1
Settings → General → Features

勾选:

1
Discussions

三、安装 Giscus App

打开:

1
https://github.com/apps/giscus

点击:

1
Install

安装时建议选择:

1
Only select repositories

然后只勾选你的评论仓库,例如:

1
blog-comments

安装完成后,Giscus 才有权限在这个仓库里创建评论讨论。

四、生成 Giscus 配置

打开:

1
https://giscus.app/zh-CN

填写仓库:

1
你的GitHub用户名/你的评论仓库名

例如:

1
fchenju-oss/blog-comments

推荐配置:

1
2
3
4
页面 ↔️ Discussion 映射关系:pathname
Discussion 分类:Announcements
语言:简体中文
主题:light

页面下方会生成一段 <script>,里面有这些重要参数:

1
2
3
4
5
data-repo="fchenju-oss/blog-comments"
data-repo-id="*******"
data-category="Announcements"
data-category-id="***************"
data-mapping="pathname"

这些值后面要填到 FixIt 的配置里。

五、配置 FixIt 主题

打开 Hugo 项目的配置文件:

1
hugo.toml

找到评论配置。

首先开启全局评论:

1
2
[params.page.comment]
enable = true

然后开启 Giscus:

 1
 2
 3
 4
 5
 6
 7
 8
 9
10
11
12
13
14
15
16
17
[params.page.comment.giscus]
enable = true
repo = "fchenju-oss/blog-comments"
repoId = "********************"
category = "Announcements"
categoryId = "**********"
mapping = "pathname"
origin = "https://giscus.app"
strict = "0"
term = ""
reactionsEnabled = "1"
emitMetadata = "0"
inputPosition = "bottom"
lang = "zh-CN"
lightTheme = "light"
darkTheme = "dark"
lazyLoad = true

注意:repoIdcategoryId 从 Giscus 官网生成的配置中复制。

六、关闭其他评论系统

如果只使用 Giscus,其他评论系统要关闭。

例如 ****:

1
2
[params.page.comment.****]
enable = false

原则是:

1
只开启 Giscus,其他评论系统全部关闭。

七、文章开启评论

文章 Front Matter 中不能关闭评论。

如果文章开头有:

1
comment: false

要改成:

1
comment: true

八、本地预览评论

FixIt 在普通开发环境下会禁用评论系统。

如果直接运行:

1
hugo server

可能会看到提示:

1
当前运行环境是 development,评论系统不会启用。

所以本地预览评论时,要使用 production 环境:

1
hugo server -e production

评论区一般会显示在文章底部。

九、部署时使用 production 构建

部署脚本中建议使用:

1
hugo -e production

而不是:

1
hugo

例如:

1
2
echo "开始构建 Hugo..."
hugo -e production

这样正式部署时评论系统会正常启用。

十、常见问题

1. Giscus 脚本没有加载

可以在浏览器 Console 中执行:

1
document.querySelector('script[src="https://giscus.app/client.js"]')

如果返回:

1
null

说明页面没有插入 Giscus 脚本,需要检查 FixIt 配置。

5. 仓库配置错误

确认评论仓库满足:

1
2
3
4
1. Public 仓库
2. 开启 Discussions
3. 安装了 Giscus App
4. category 和 categoryId 对应正确

总结

Hugo FixIt 添加 Giscus 评论功能的核心步骤是:

1
2
3
4
5
6
7
1. 创建 GitHub 评论仓库
2. 开启 Discussions
3. 安装 Giscus App
4. 在 giscus.app 生成配置
5. 填入 hugo.toml
6. 文章设置 comment: true
7. 本地用 hugo server -e production 预览

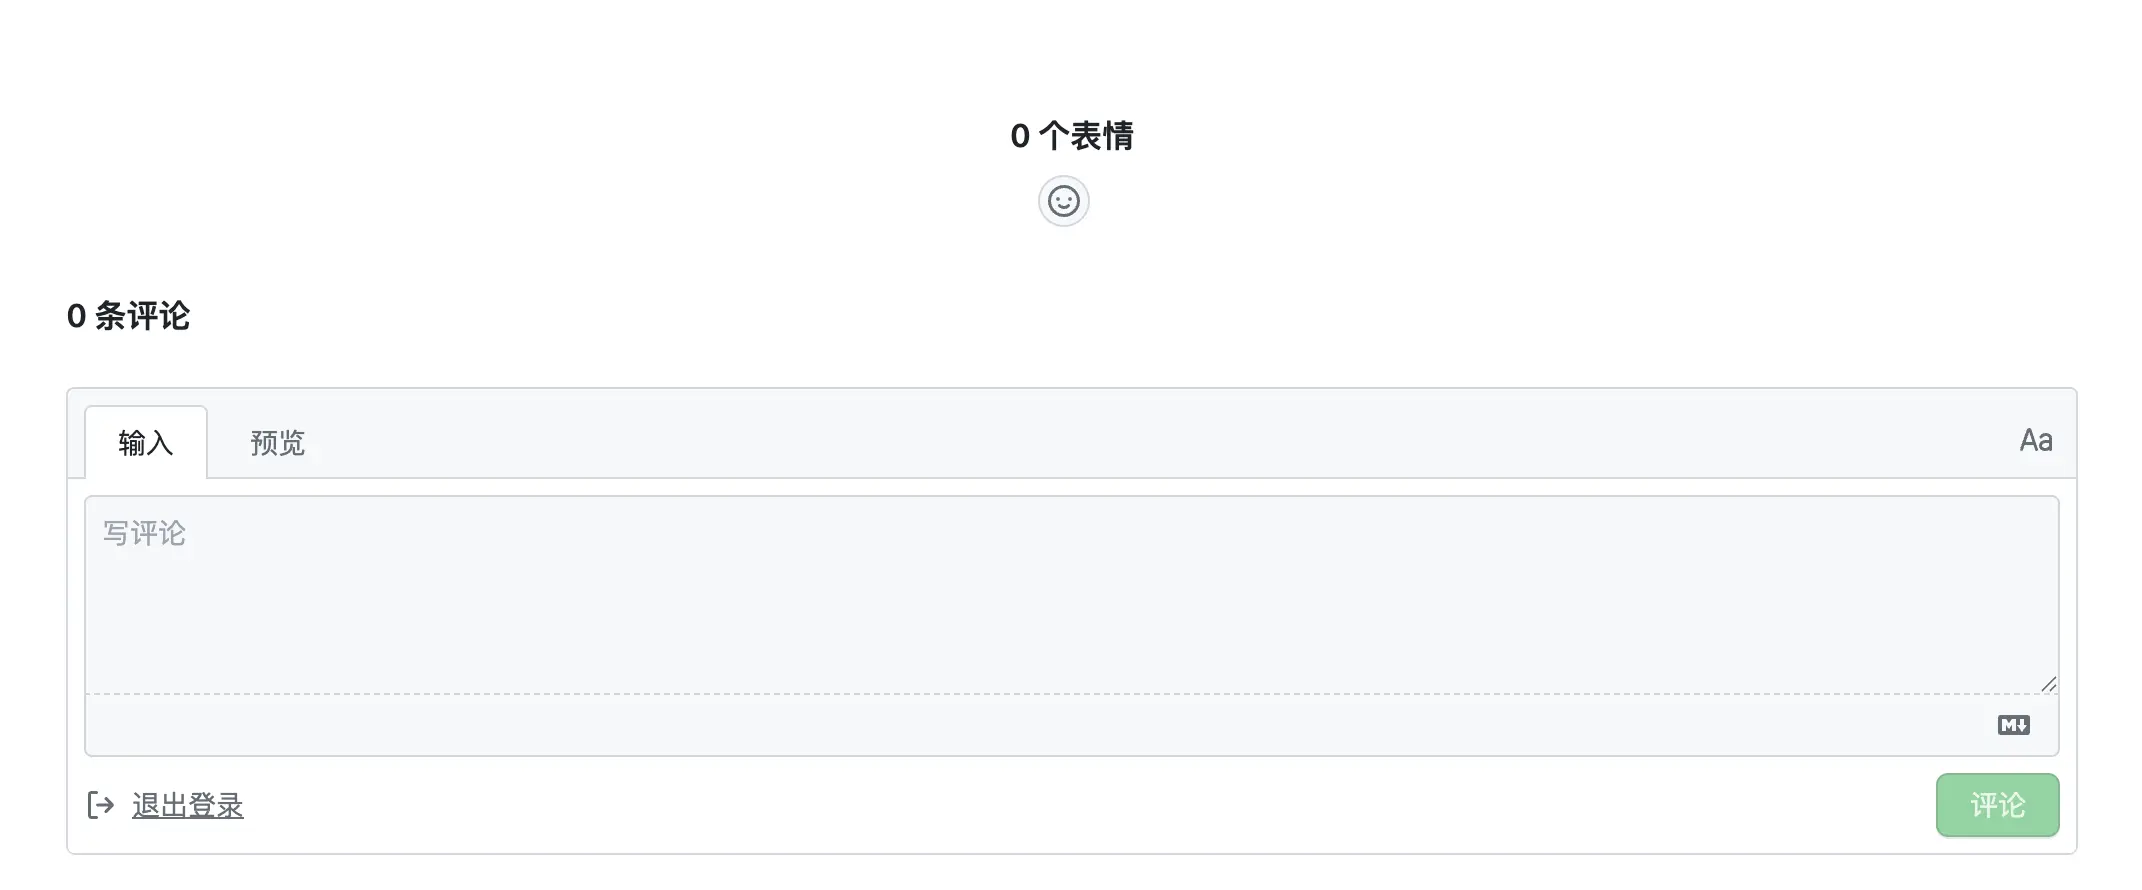
配置完成后,博客文章底部就可以显示 Giscus 评论区。 FixIt添加Giscus评论功能-i14pmg5


相关内容